Panasonic ProClub - Online manual
File Explorer
| Content Management > File Explorer |
It is very important to understand how the explorer works in order to manage correctly all contents published in PRO Club.
In this section, you will learn how to make the best use of the provided default libraries as well as your own country's libraries to facilitate update processes and content renewal of the website.
File explorer is available for all website sections where you can upload pictures, PDF files…
By default, when opening the file explorer, you will see the folder of the specific section (news, catalogues…) where the files are/will be stored.
 is the commonly used icon in all the sections of the Admin Area where you are able to attach documents. All files available in PRO club must previously be uploaded in the tool in order to be used and displayed in the website.
By clicking on this icon, you will open the File Explorer.
File Explorer is divided into two categories:
Once in the File Explorer, you either have the possibility to select an existing document, or to upload a new file.
By default, File Explorer will always open the file corresponding to the specific section you are updating:
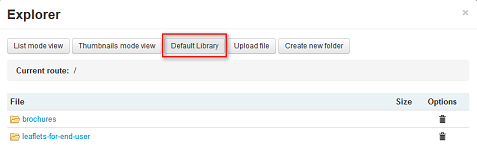
If there are no appropriate resources in your country's own library, we suggest that you take a look at the default european library.
To make maintenance easier, a large library of default resources is available. This library of banners (mini, mega, promo) consists in generic images that can fit in several sections. To pick a banner from the general library, click on the button "Default Library".
Depending on the browser installed in your computer, you may be able to upload several files at the same time or not. Also, according to your browser, the icon showing the progress of upload can be displayed on top of the screen in form of a circle or in form of a bar... and can be more or less easy to see... It depends of the technology supported by the browser, please note that we cannot standardize or modify these parameters.
If you want to upload images, please remember that accepted Formats are JPG, TIF, PNG
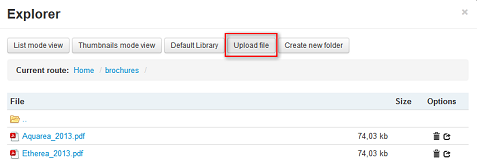
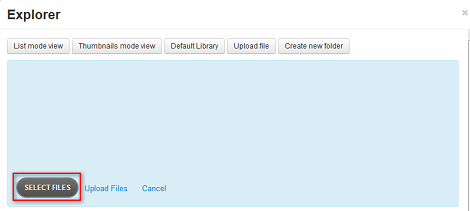
1. Click Upload file
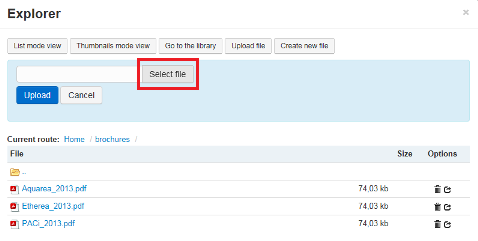
2. Click Select file(s)
This opens the internal file explorer of your computer. Look for the file(s) you want to upload.
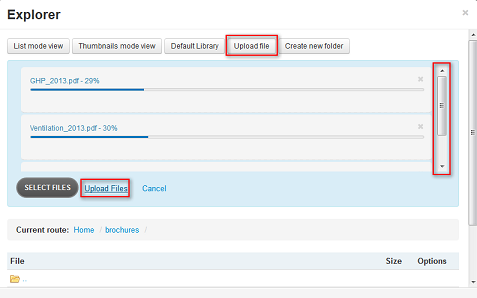
Depending on your internet browser, you might be given the possibility to upload several files at a time (or not). In this case, the design of the popup window is slightly different. Examples of single and multi upload are shown in the screenshots below.
 .
.
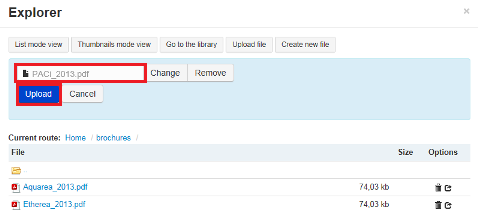
3. Click Upload
Example: single upload -> Selected file appears in the white field
Example: multi upload -> all files are displayed at the same time with a progress bar
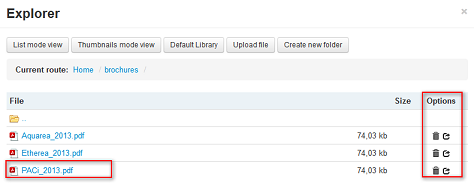
4. Your file appears like one selectable element. Select it and you will be redirected to the main page
If necesary, you can delete and visualize files thanks to the icons available on the right side of the window.
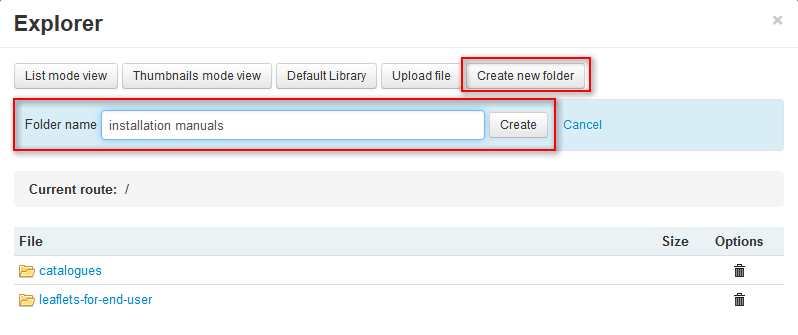
In order to organize better your contents, we suggest that you create subfolders as and when you need them to separate information. In the popup window of the File Explorer, click on "Create a new folder" and choose a name.